Thursday, May 1, 2014
Thingiverse Customizable Print
As I start to learn how to use the printer I am trying different types of prints so I can learn some of the pitfalls of my system. I looked up customizable files on Thingiverse and found some crystal like structures that you can change the height, width, number of components, etc. When these files become complex I found that the slicer software takes a lot more time to read the file. The next time I find a complex file I want to print, I will put it into the software and go to bed. I think the software had problems reading the file when it did the slicing because of the look of this piece. If you notice, the top of the smaller section has a squared of point instead of a diamond tip like the larger section. At the same level there is an off set section on the larger component of the piece.
Wednesday, April 30, 2014
Printing a More Objects
These are some earrings I printed off of Thingiverse. This print was done at the highest resolution available on the XYZ software. Clearly, you can still see the ridges from the layers of printing. My friend told me that you can use nail polish remover to smooth the print ridges. I noticed when printing this object that the top of the tear drop in the form got goopy when printing because the surface was so small and pointy. I think this might be solved by pausing the printer a couple of times at the top of the print. I think it will allow the plastic to solidify before stacking a new layer on top.
Here is a crystal-like structure that I took from the customizable forms on Thingiverse. In the photo you can see a flat top on the right side of the structure and a ridge on the larger column. I think this is an error in the slicing function of the XYZ software. I also noticed when playing with the customizer that you must have a flat surface on the model to start printing correctly. This will allow the plastic layers to stack correctly. This model also printed with a "stilt" created by the software to hold the diagonal piece up when printing. I wish I had taken a photo of the cross section of the piece when it was in process because it has a thin honeycomb or hex structure in the interior to give it strength.
Downloading an STL File off of Thingiverse
This is the first print I made with a computer. I downloaded the file off Thingiverse. I chose this object because it is designed to overcome the proprietary filament cartridges designed for the XYZ printers. I saw online that if you take an Arduino Mini, dump some code into it, one can reset the filament counter in the cartridge and save money on filament. More information on this hack can be found at this site: wctek.com/xyz
Hooking the Machine to a Computer
After the test print I hooked the machine to one of my lap tops. The printer came with XYZ software for reading and slicing STL files to send to the printer as well as a driver for communication with the computer. It took me a bit to figure out how to set up all the software because I'm using my old PC for this application and I have been using primarily MACs for the last year or two. The printer software is only available for MAC OSX 7 or later, so be aware if you buy one of these machines.
First Print
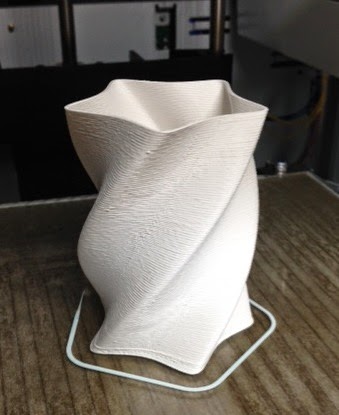
After plugging in the machine I followed the instructions for loading the filament and fired it up for a test print. The machine comes pre-loaded with 3 files to test print without hooking it to a computer. I chose the star cup because it seemed most interesting to me. The time I opened the box to when I started the first print was around 45 minutes. All worked well with the machine and I am impressed with the ease of set up. I have looked a few things up on this type of printer and there is a video that shows an owner that used a dremel to saw a slot in the back to expose an SD card that holds the sample files in G code. If you are into hacking this could be pretty cool because you could load G code into the card and use the machine without hooking it to a computer.
Here is the finished star cup.
Printer Came in the Mail!!!
My 3-D printer came in the mail yesterday with an extra box of filament that I ordered along with it. I ordered it online from a website called Studica after doing a little research on the model. I feel like I took a little bit of a risk as the online reviews of this product are a little bad. However, the price is the best I have seen yet ($530 with shipping) and It has a 7.8"X7.8" build size. I pulled the trigger because everything I have read about 3-D printers leads me to believe they are all a little bit buggy anyway. I was very impressed with the shipping. Studica sent me an e-mail as soon as the printer was shipped out and it made it to my door step on day 4. Not bad with Fedex ground service.
Subscribe to:
Comments (Atom)
.JPG)
.JPG)
.JPG)


